I have previously described how to set overnight charging times (for Economy 7 or similar tariffs) on our most popular PowerBanx systems which use an inverter made by Sofar; here I’m going to cover the same process for PowerBanx systems which use an inverter made by Victron.
These inverters are more expensive but have the unique ability to keep your solar generation running in a power cut, something that is important to some of our customers (not many people appreciate that nearly all solar inverters installed in the UK shut down in a power cut). One example can be seen in our Video Blog of a Serious Off-Grid Capable System.
Of course, PowerBanx battery systems with Victron inverters have exactly the same ability as our others to save you money on your electricity bill: you charge it on a combination of free solar and half-price Economy 7 electricity then use it to run your home when you would otherwise have to pay full price for your power.

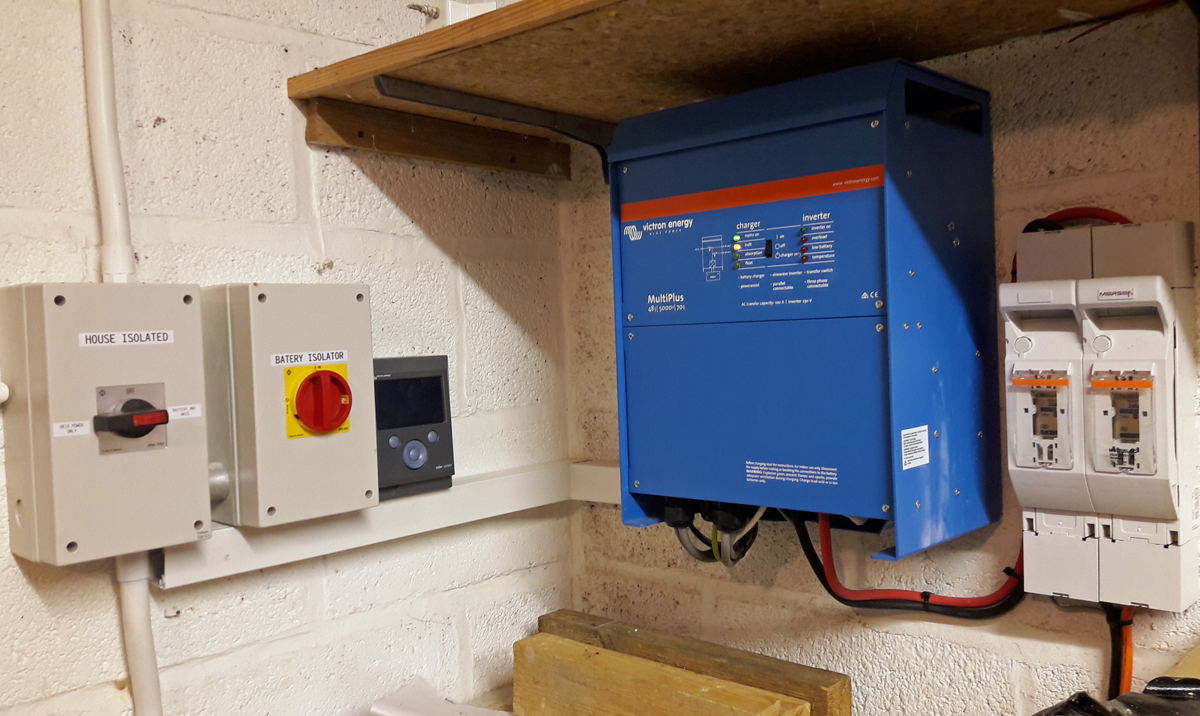
Victron MultiPlus Battery Inverter (Image: T. Larkum)
Step 1: Online Portal
Log into your online portal; this will be at the usual address for monitoring your system: https://vrm.victronenergy.com/installation/<id>/dashboard where <id> is the unique number for your system.
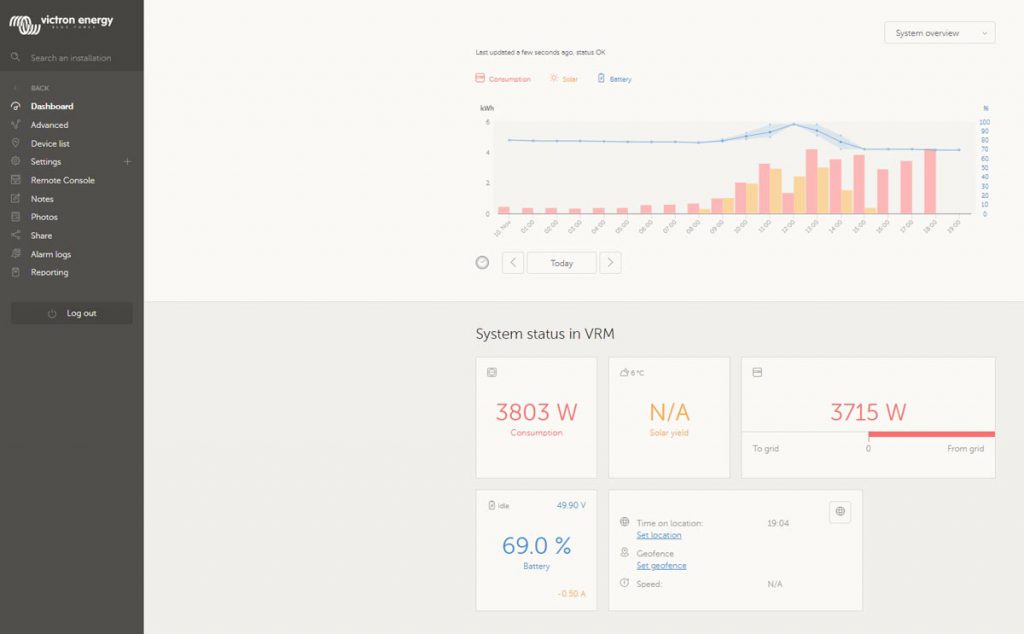
Victron Portal Dashboard (Image: T. Larkum)
Step 2: Remote Console
Select the Remote Console option from the menu on the left. This will bring up a visual control panel that replicates all the controls you have on the CCGX colour display unit installed with your Victron.
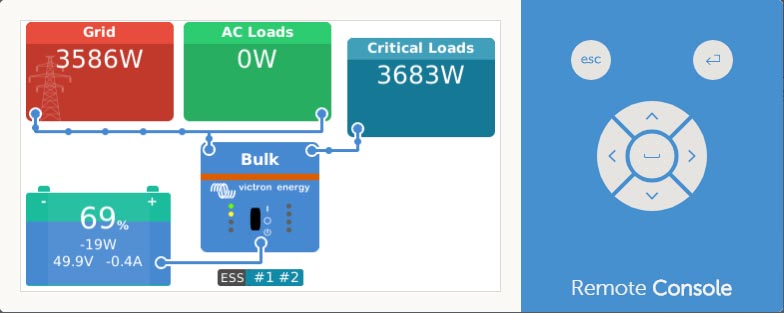
Victron Remote Console (Image: T. Larkum)
You move through the menus the same as on your colour display unit by using the up/down, left/right, enter and escape buttons on the right side; these can be selected with the mouse on a PC or your finger on a touchscreen, or you can select directly in the left window.
Step 3: ESS Settings – Scheduled Charging
Press the Enter or central button to get into the menus and navigate to Settings then ESS (‘energy storage system’) then Scheduled charging.
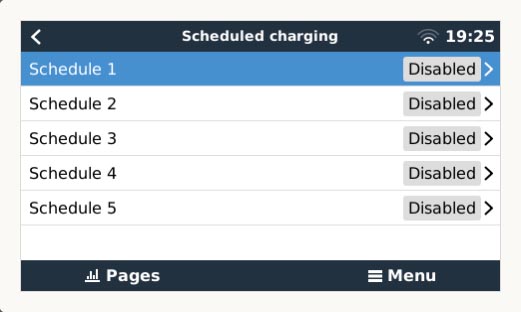
Scheduled Charging Settings (Image: T. Larkum)
Step 4: Enable Scheduled Charging
You can have up to 5 different schedules running; I’ll just illustrate setting the first one.
Select Schedule 1 and press the right button to enable it. Then you can adjust the settings as you wish.
Here I have set it to charge up every ‘Sunday night’ (i.e. from 1am to 6am Monday morning). I have also enabled Stop on SOC where SOC means State of Charge, i.e. charge only up until the battery is at a given charge level. I’ve used the default value of 95%.
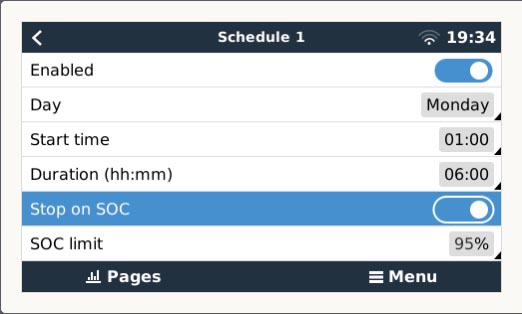
Example Scheduled Charging (Image: T. Larkum)
Result
Checking the next day on the Victron portal, under the Advanced menu tab, we can see that it has worked. From 1am the battery has charged up until it reached 95% SOC and has then stayed there until 7am.
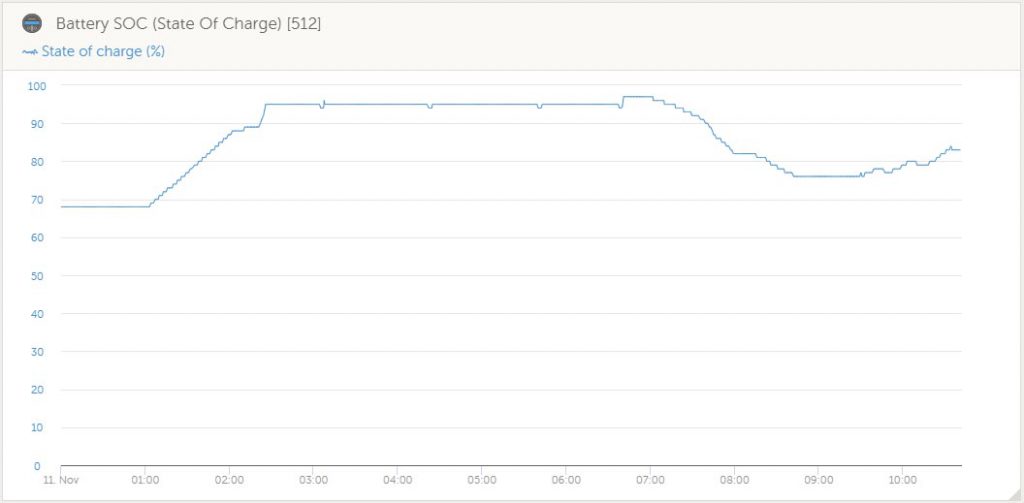
Victron Portal Advanced Tab – Battery State of Charge (Image: T. Larkum)
As a matter of interest we can also see that the battery then started to discharge as expected to save us money (by stopping our utility meter from ticking over). It has covered usage over the breakfast period (mostly the tumble drier) until the solar panels kick in at about 9am and start the battery charging up again.
Summary
Follow this procedure to set overnight charging on your Victron-based PowerBanx home battery system. With these settings my system will charge to 95% full every Sunday night. It will then discharge to run the house using cheap Economy 7 electricity. This is in addition to its standard behaviour of charging up on spare solar power which is unaffected.