After some weeks of anticipation our PowerBanx home battery storage system has been installed and is now up and running. I plan to do lots of blogging about it, but to kick things off I’m just going to post some before and after photos.
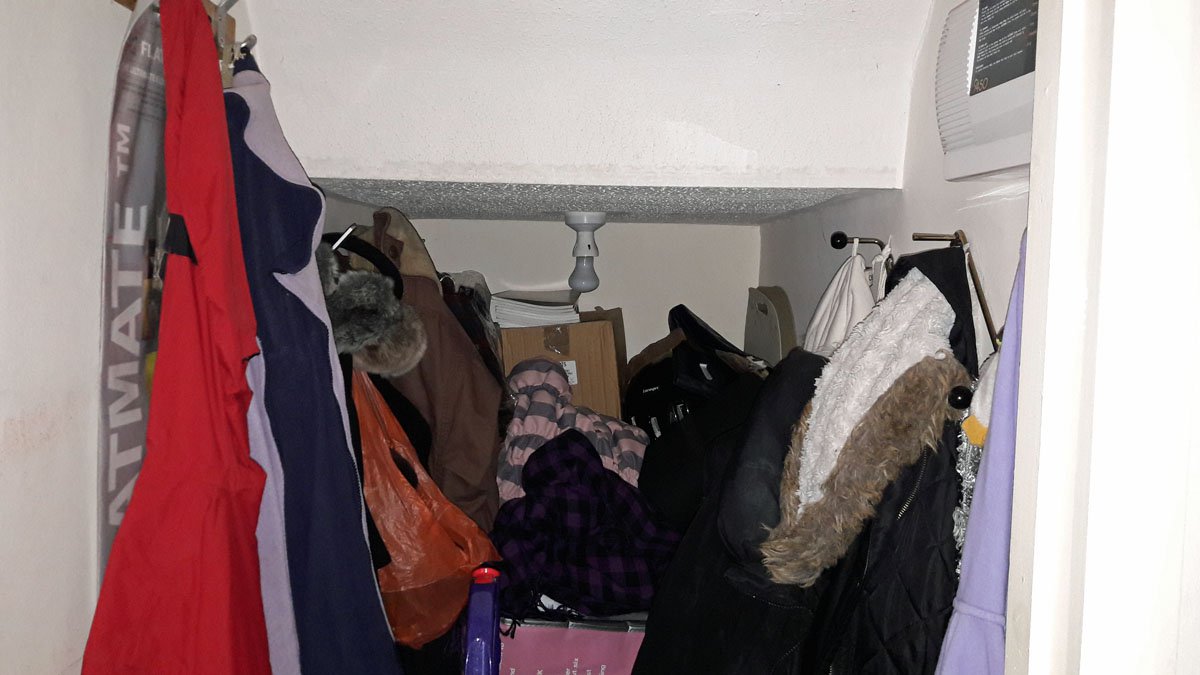
The PowerBanx has gone into our cloakroom, which is really just a large cupboard with coat hooks, a light and an alarm panel. I had boxes of books stored at the back: ahead of the install I moved these to the loft to provide enough space for the PowerBanx.
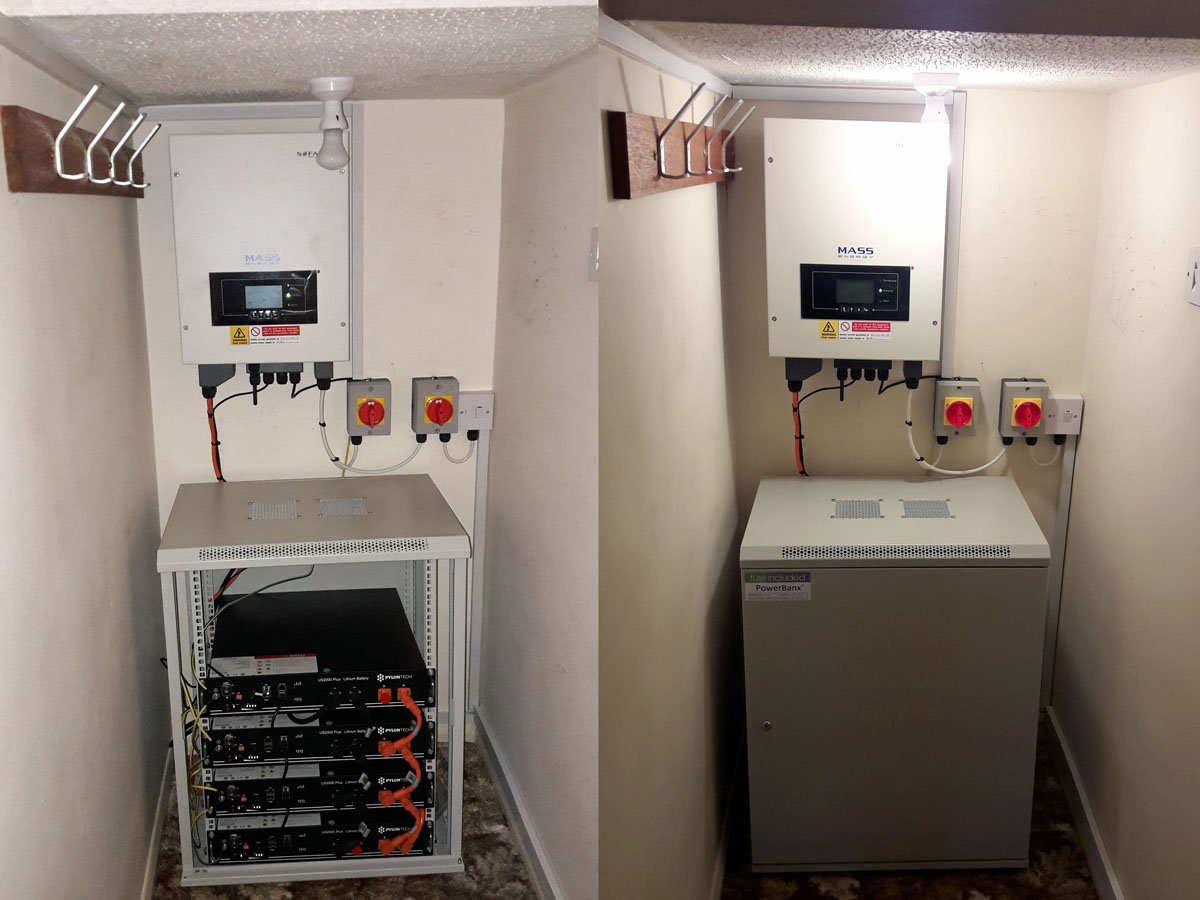
The evening before the install I cleared out the coats, Dyson, and other stuff. After the install, for a brief while the PowerBanx could be seen at the back – first naked, with its batteries exposed, then fully clothed. I chose a ’15U’ enclosure in light grey – big enough to take 6 batteries eventually, though I’m starting with 4. You could also see the isolator switches, to break the connection to the main consumer unit and to the emergency 13A socket (just out of view bottom right – this comes on when there’s a power cut).
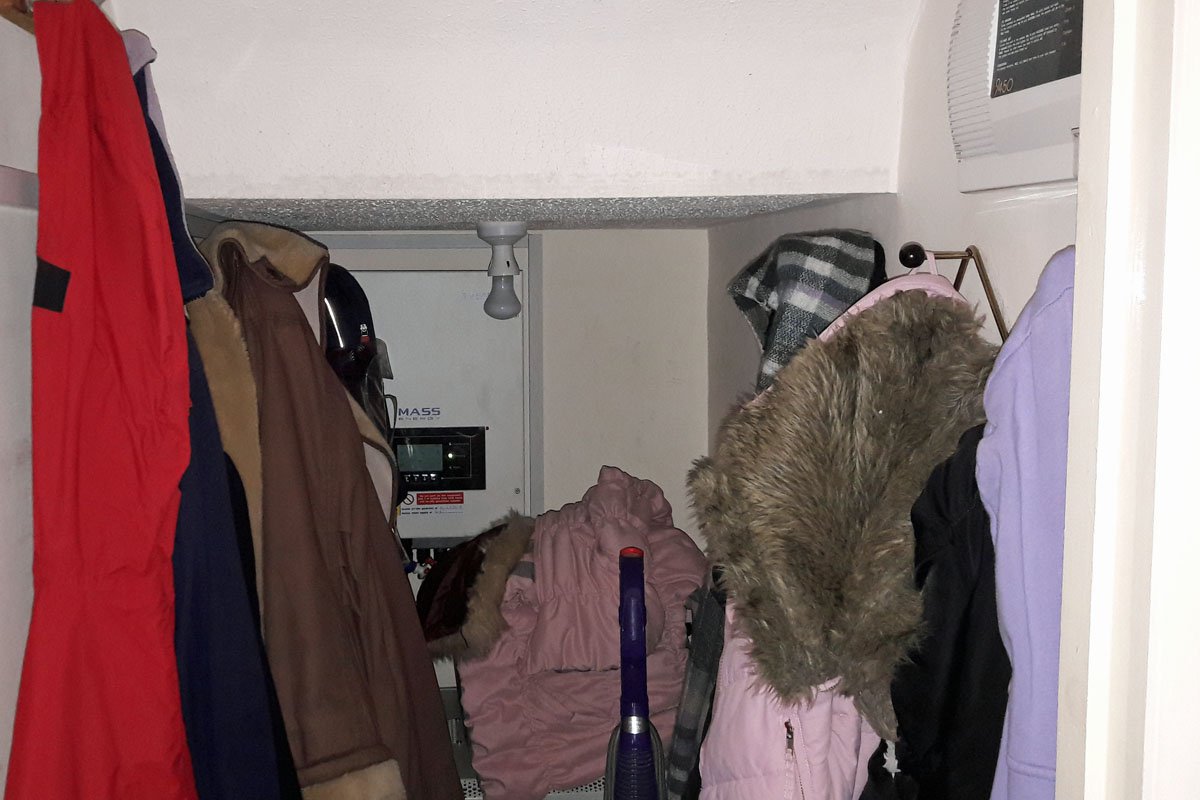
Then a short time later the coats and other stuff went back and things returned to normal. The only real difference now is that you can see status lights at the back of the cupboard (blinking when idle, constantly lit when charging or discharging).
Next I’ll write up the details of the install. In the meantime, for more information and to see the explanatory video visit the PowerBanx product page.
Update: Installation
