So you’ve learnt all you need to know about solar panels and you know what solar can do for you, now it’s time to understand the basics of putting solar panels in place. For large commercial solar farms it’s common to install them on metal frames out in the open, but for nearly all other cases we are talking about fixing them onto roofs and that is what we’ll cover here. Note that in most cases you can install panels on your own home roof without needing planning permission (for more details see Do I need Planning Permission?).
When installing panels on a house there are 6 main roofing options, and we can do all of these as required:
- A pitched roof with concrete tiles – this is the most common situation.
- A pitched roof with clay tiles – this is the case with many older (pre-war) properties.
- A pitched roof with slate tiles – this applies to many rural properties.
- A pitched roof with the panels integrated into the roof to replace the tiles – some people prefer the look of this method. It has additional costs but can be cost effective if the roof needs replacing anyway (as fewer tiles are required, just around the outside of the panel area).
- A flat roof with ballast. If a flat roof is strong enough then panels can be held down with ballast (concrete blocks) for a relatively cheap system.
- A flat roof with positive fixings. If there is a question mark over whether a flat roof can support ballasted panels then they are bolted into place. This uses particular fixings that then need to be waterproofed so this increases the cost compared to ballasting.
We won’t look in more detail at flat roofs now, though we have covered the bolted fixings in detail before. Here we’ll cover the most common installation situation, concrete tiles, as it’s the simplest and cheapest. Note though that clay tiles are similar (but need the addition of rubber protection tiles known as Hookstops, see below) and to an extent so are slate tiles (though the fittings we describe here are replaced with specialised fixings that increase the cost significantly).
The process for installing panels on a concrete tile roof is pretty straightforward. Scaffolding is fitted some days ahead of the install. Installation begins with tiles being lifted at intervals; a roof hook is screwed into the rafters and the tiles are replaced just as they were before.
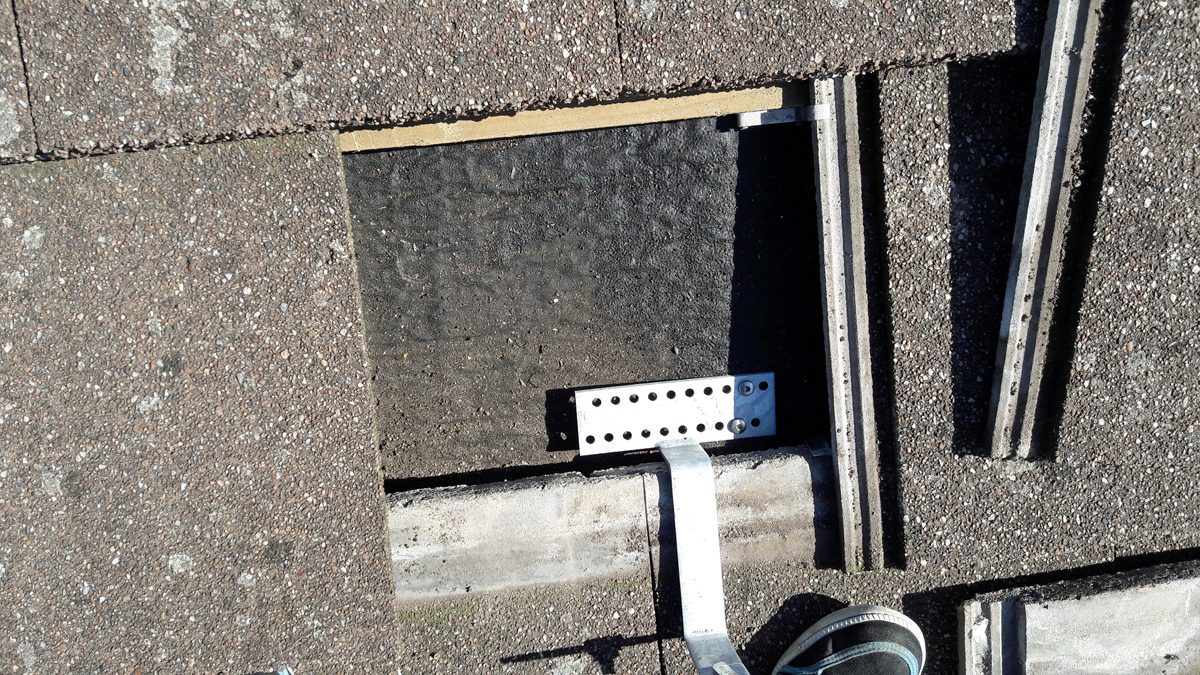
A solar roof hook is screwed onto a rafter (Image: T. Larkum/Tanjent)
The end result is a matrix of secure hooks in place. These here are seen on a roof of flat concrete tiles but it’s much the same for curved tiles and pantiles.
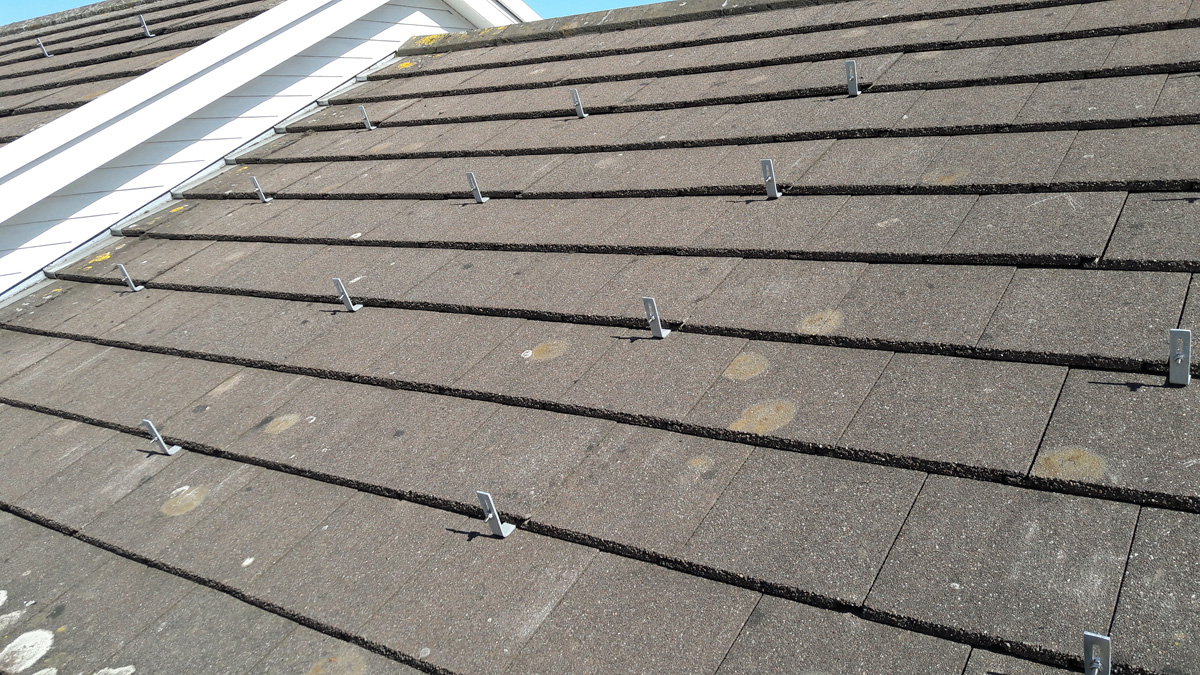
A matrix of roof hooks in place (Image: T. Larkum/Tanjent)
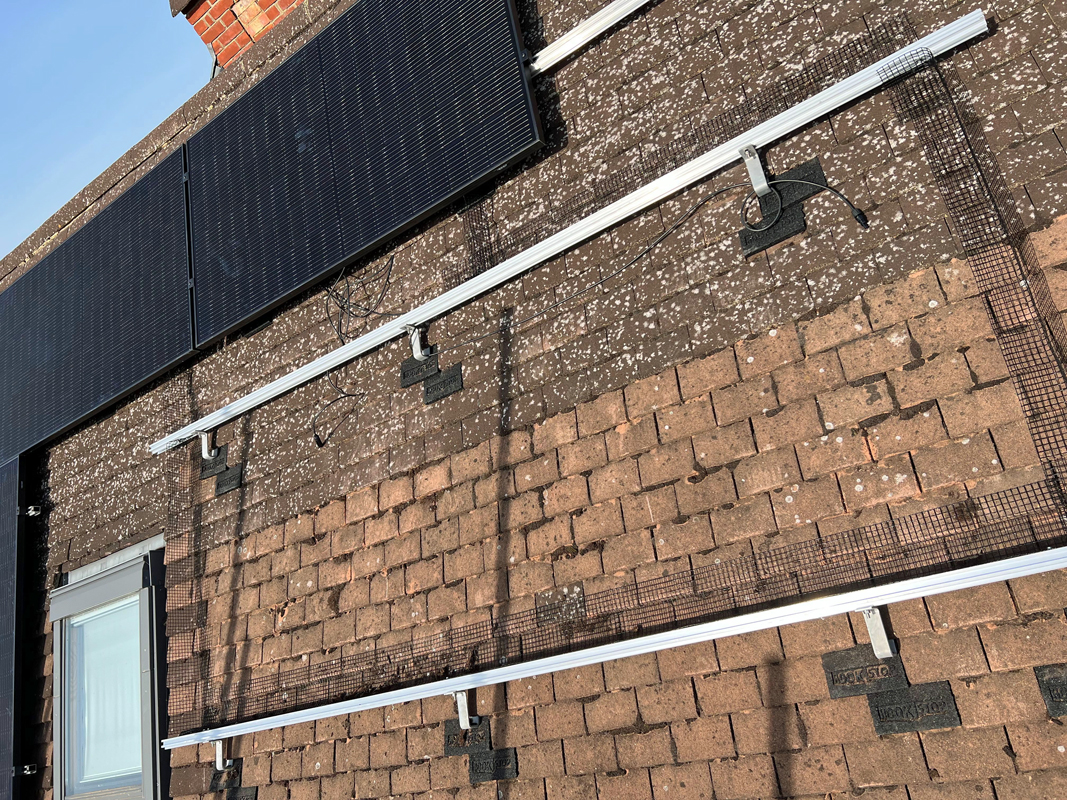
Next aluminium rails are bolted to these hooks. Typically these are laid horizontally starting at the gutter and working upwards (not least so that the roofers have somewhere secure to stand as they move higher) but occasionally they are mounted vertically. They can be seen in place here, along with the cables that will be joined to the panels – these go under the roof tiles to the inverter (typically mounted in the loft).
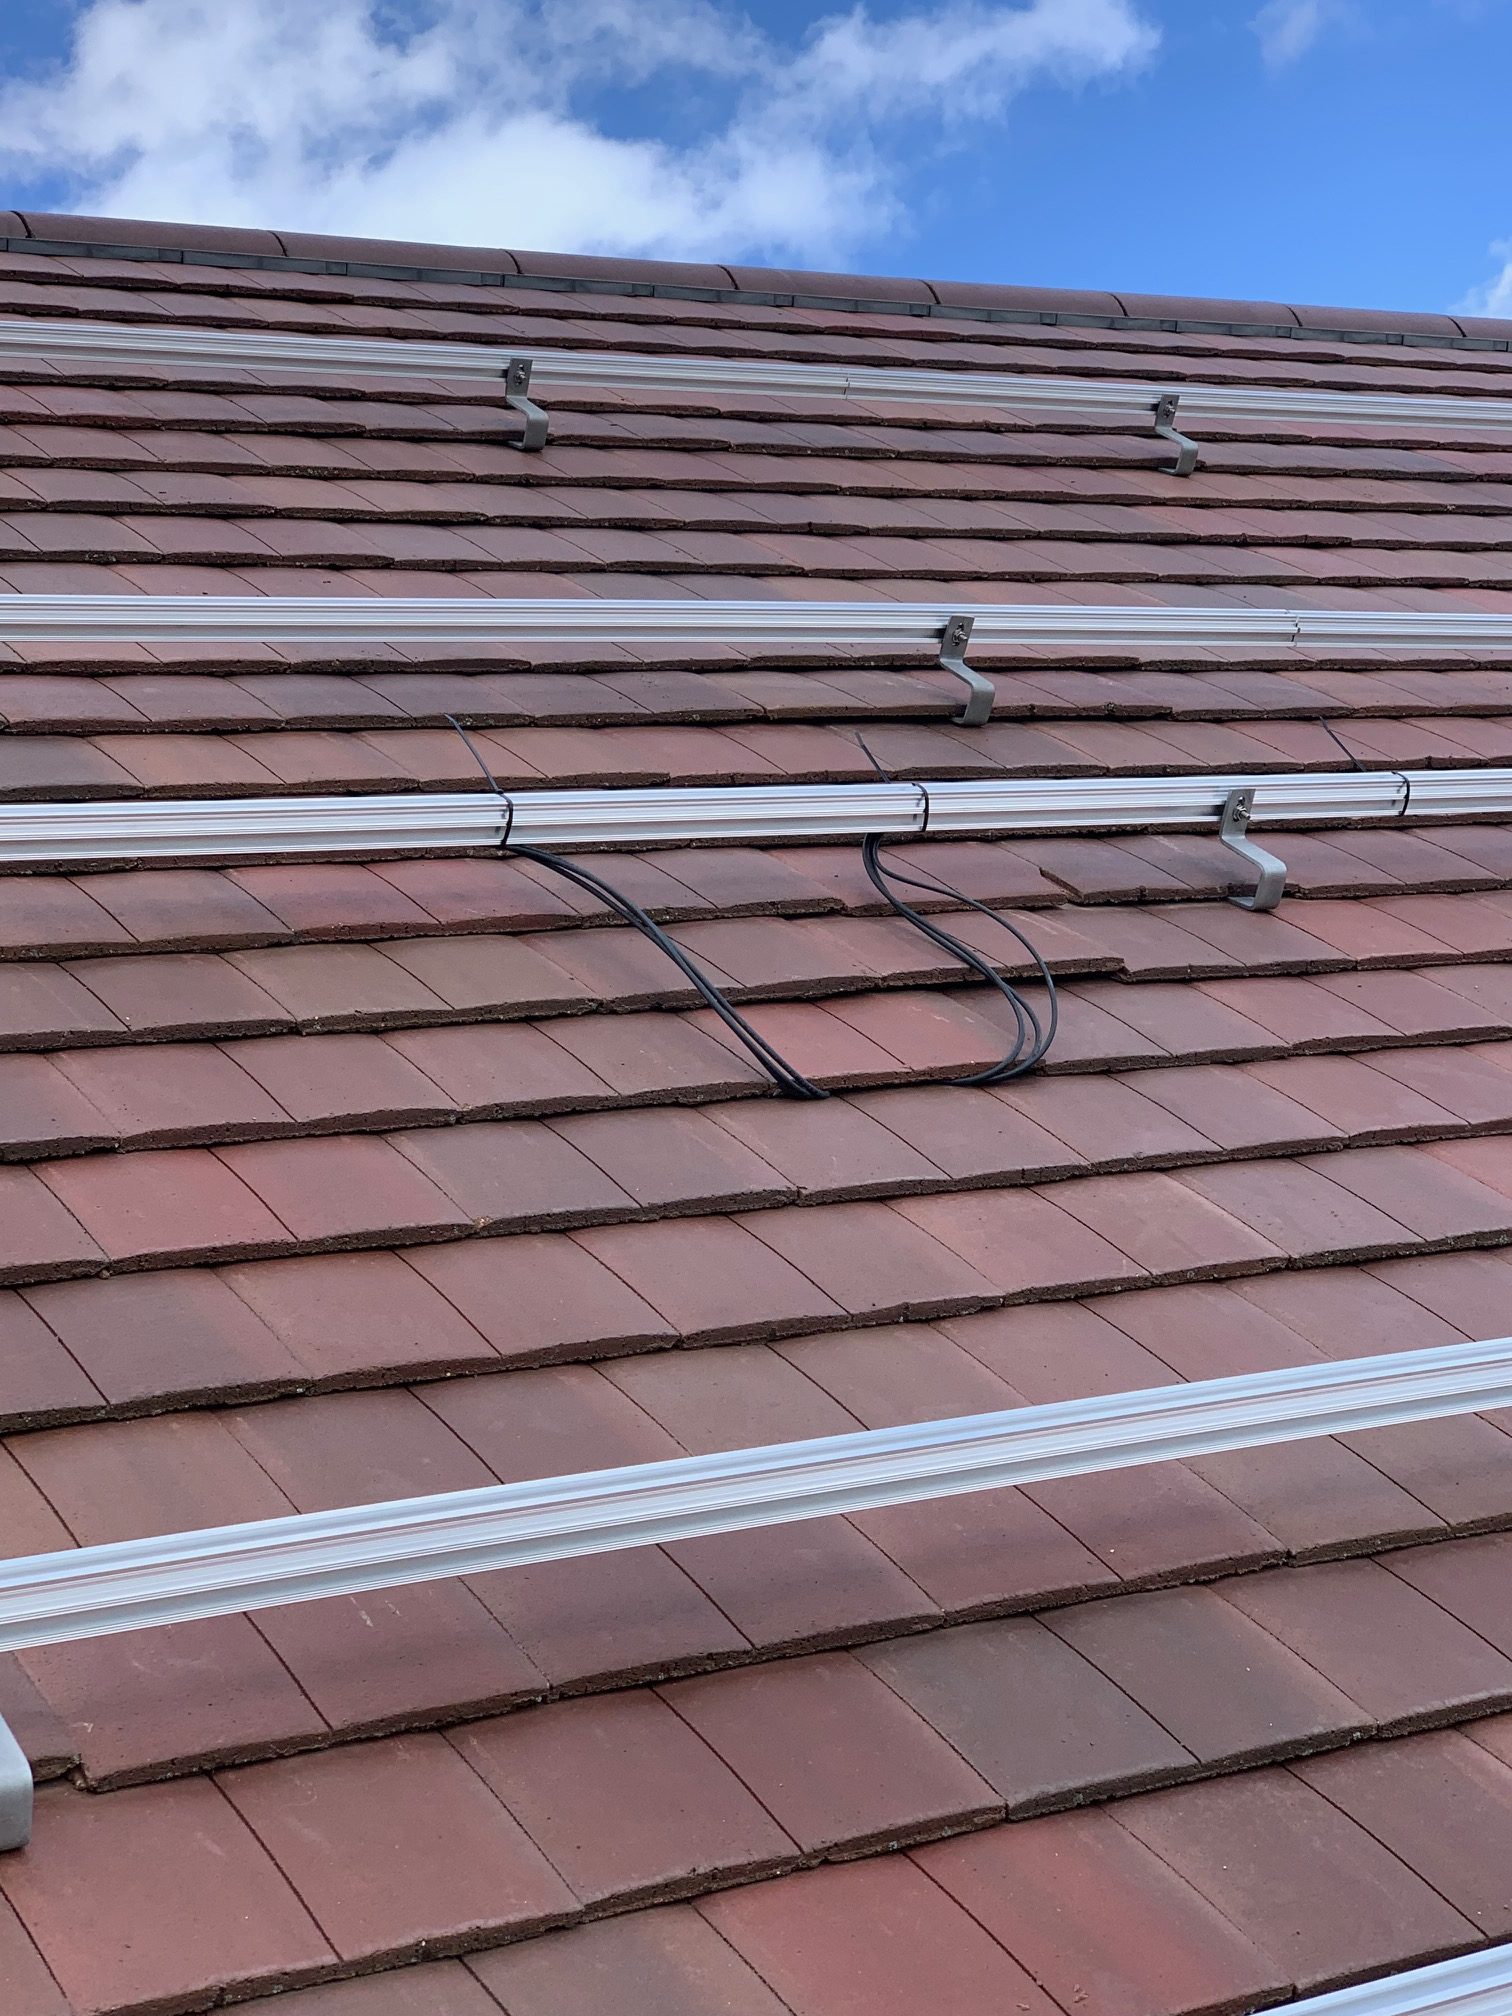
Roof rails in place ready for solar panels (Image: Tanjent)
Then the panels are laid on the rails and fixed down. They are held down with clamps, typically 2 on each side of each panel (with clamps between panels working to either side). Interestingly, the panels are only held in place by the friction from the clamps; this means they can be adjusted in place fairly easily to ensure they line up well and look good aesthetically. Here they are being clamped down and the bolts torqued up.
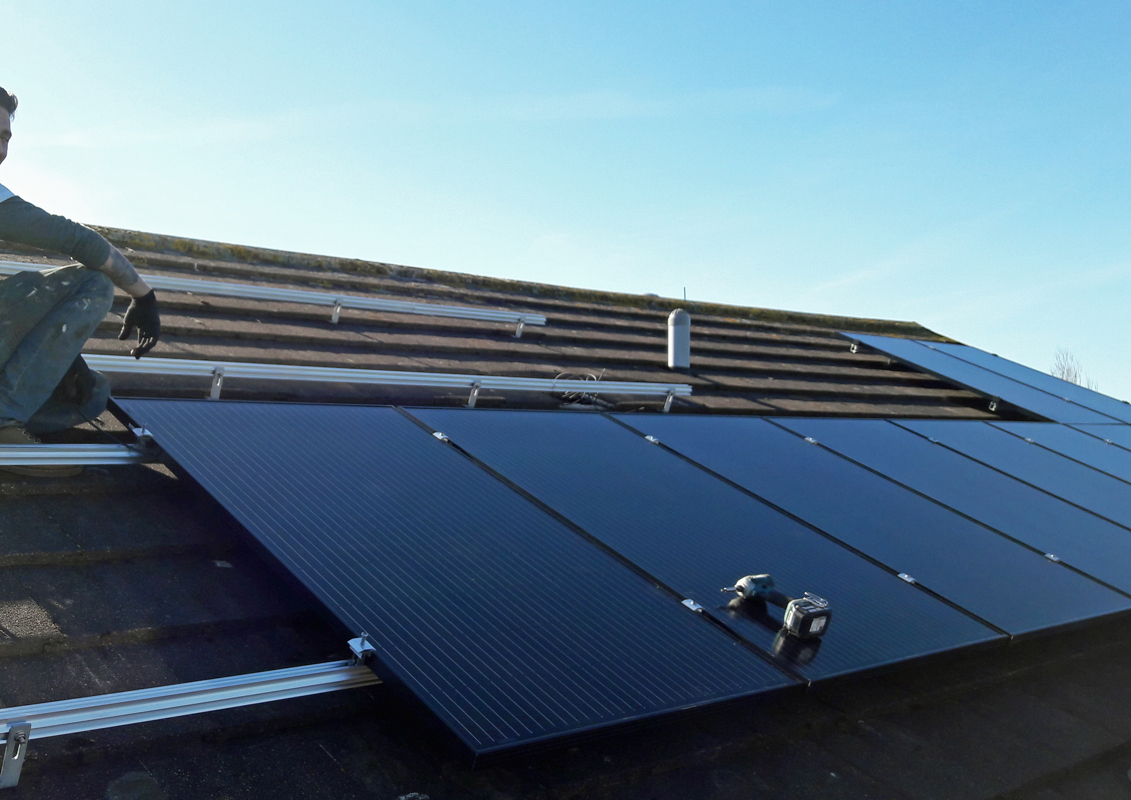
Solar panels being clamped to their rails on a flat concrete tile roof (Image: T. Larkum/Tanjent)
Solar panel rails on a clay tile roof – note the additional Hookstop rubber tiles (Image: Tanjent)
Each panel has a positive and negative DC cable; these are attached to the next panel along in a string. The end cables then go through the roof, as seen above, to get connected to the inverter.
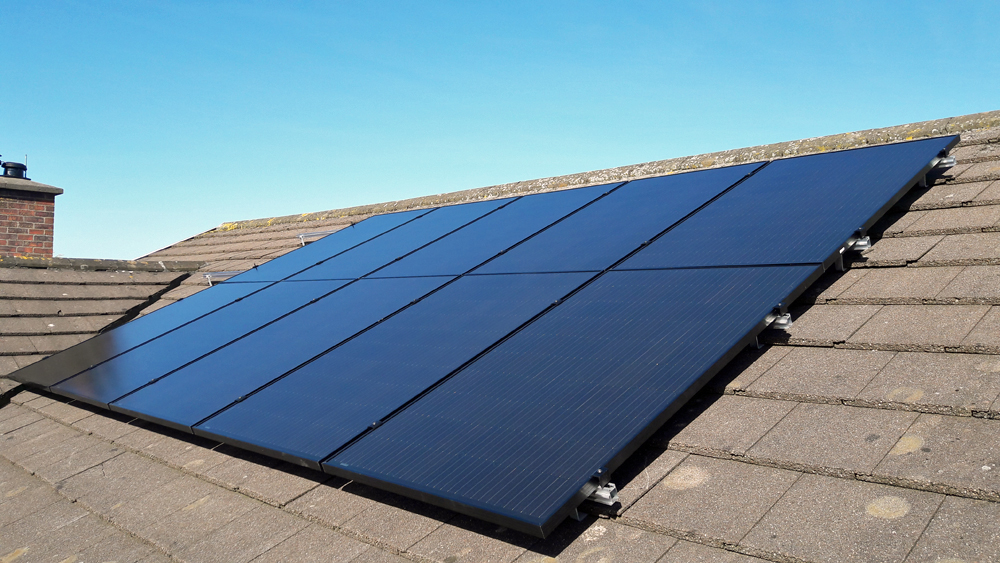
A completed array of solar panels in place (Image: T. Larkum/Tanjent)
Once connected up, and with the sun shining, the inverter is started up and ‘commissioned’. As part of this process it will be connected to the Internet so that the homeowner can see how much electricity the system is generating via an online website and a smartphone app.
Finally, about a week after the install (so we know everything is working reliably) the scaffold is removed. Job done.
It’s Time to Go Green!
If you would like to know more about Solar Panels and the PowerBanx range of home battery systems, and get a free instant quote, please complete our online form: