
Introduction
A Victron Battery System (inverter / charger) can work in isolation but can also be connected to the Internet; this allows for monitoring of its operation and also, through a ‘Remote Console’ feature, direct control of its various settings.
A device called a Cerbo GX provides the functionality to connect to the Internet and other systems through a variety of means (Wi-Fi, Ethernet cable, Bluetooth, GSM, etc.). It can be operated through a separate touch screen such as the Touch 50, which may actually be concealed in an enclosure, or through a device that combines the GX and screen together such as the Color Control GX, in which case there is a conventional screen with buttons below.
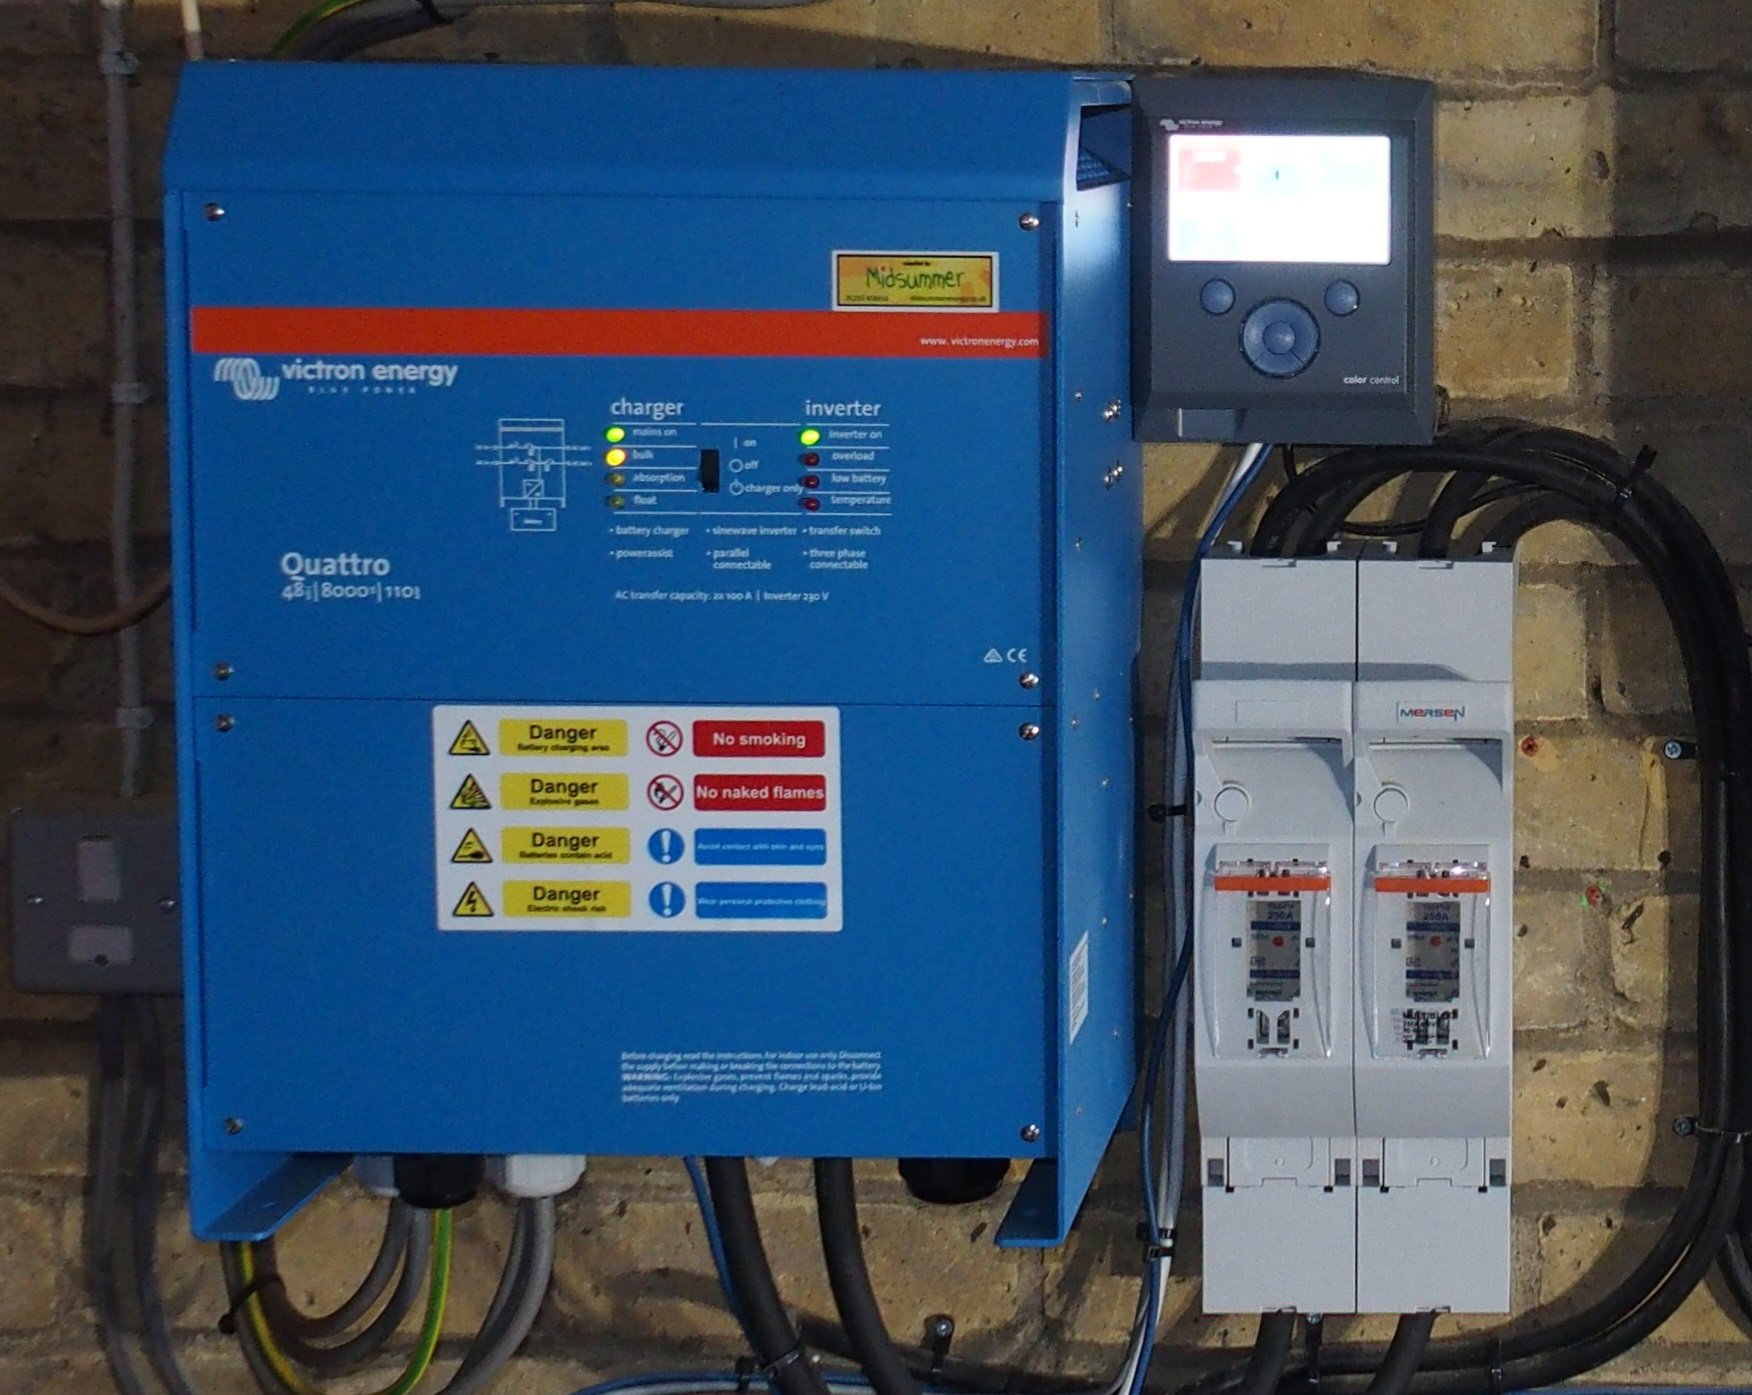
A Color Control GX with screen is shown top right (Image: Tanjent)
To begin with, if the screen is dark, pressing the screen (if a touchscreen) or any button will wake it up. The standard Overview status screen on a Touch 50 looks like the following:
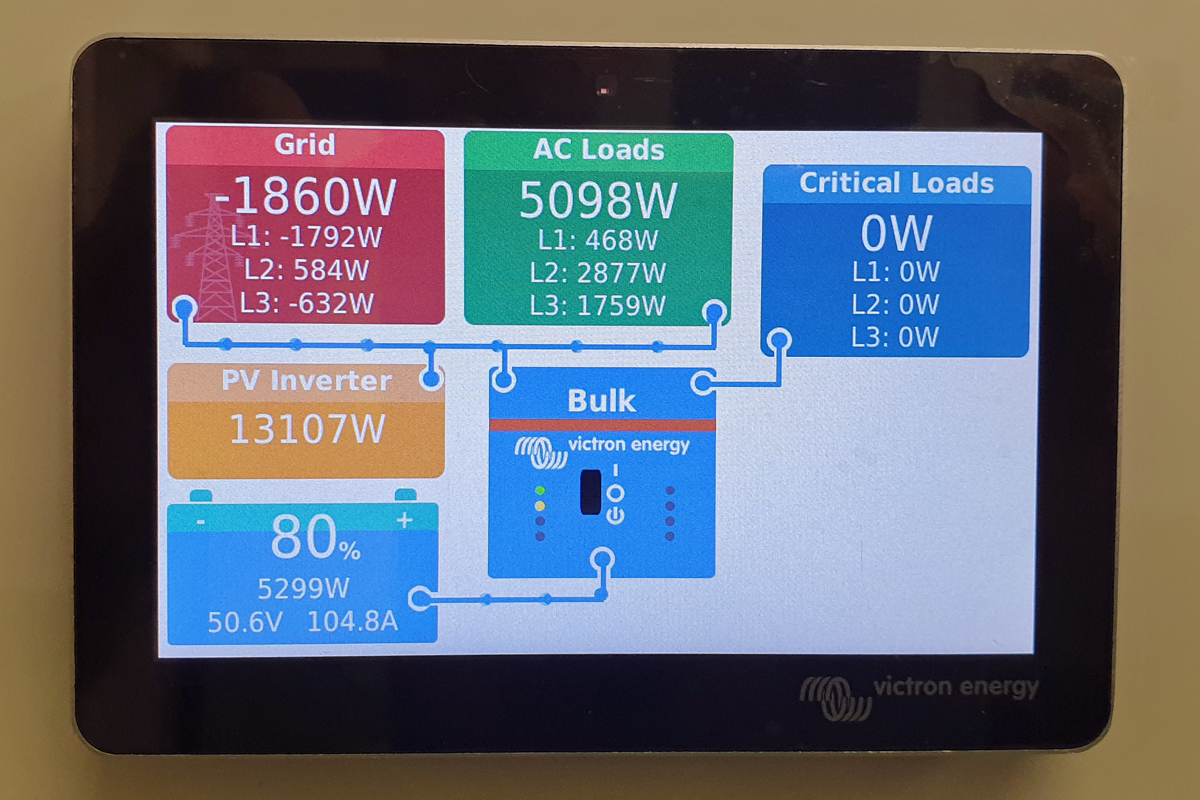
Victron status screen on a Touch 50 (Image: Tanjent)
Connecting
The sequence to connect the Victron Battery System for the first time is as follows:
1. Touch the screen bottom right, or the button bottom right, to bring up the options Pages and Menu, select Menu.
2. Scroll through the Device List to Settings:
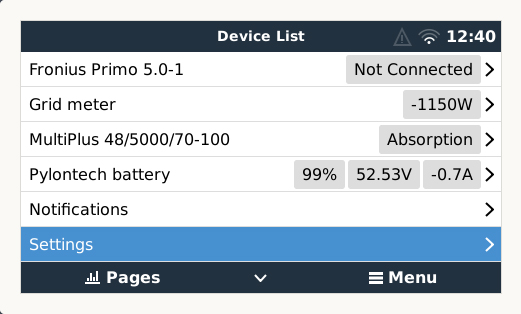
Victron Settings menu under Device List (Image: Tanjent Energy)
3. Select Settings (with the right-hand > button if not a touchscreen) then scroll down to Wi-Fi (it’s near the bottom of the list):
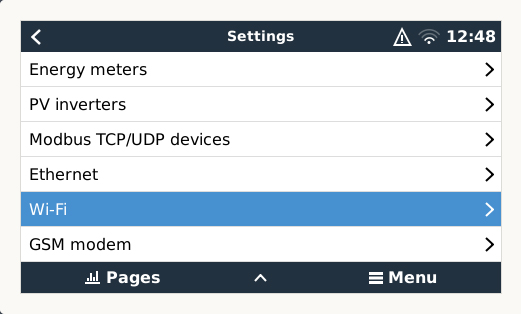
Victron Wi-Fi menu under Settings (Image: Tanjent Energy)
4. Selecting this brings up the Wi-Fi settings screen. If the network you want to use is shown and marked as Connected then the Internet link is working, and any issues you are seeing are not fixable here. If the right network is shown but marked Disconnected then follow the instructions for Reconnecting below. If the wrong network is shown or it says Wi-Fi networks then continue by selecting this line. A list of available networks is shown so select the preferred one. On the next screen enter the password.
5. If the correct password has been entered for that network then there will be a sequence of messages top right: “Connecting” then “Retrieving IP address” then “Connected”. At this point a Wi-Fi symbol will show top right, and the network settings (signal strength, MAC address, etc.) will be shown lower down:
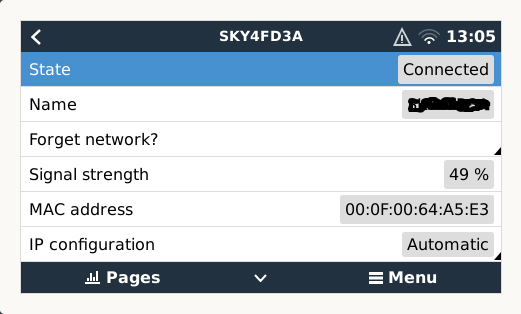
Victron Wi-Fi settings (Image: Tanjent Energy)
6. The setup is now complete. If preferred, the screen can be set back to the overview page (press the < left button to go back up the menus, and/or select Pages).
Reconnecting
If the Internet connection previously worked but has stopped working then the process described above can be followed, just select the correct network again and put in the password. However, I’ve found on my system that this doesn’t always work reliably and instead rebooting the GX works instead. The process is similar to above, but under Settings select General then Reboot? The screen will go off then show a loading screen for a couple of minutes before coming back with the previous settings – and in doing so it seems to reconnect well for me, finding the connection it had lost.
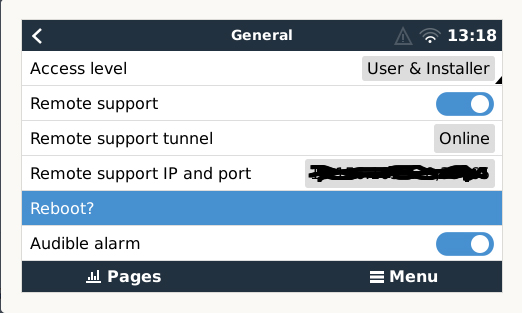
Victron Reboot option (Image: Tanjent)
Video
For those who prefer to follow along a video to set up the Wi-Fi connection, there’s a good one here from YouTube:
We are MCS Certified Solar Panel Installers. See more information on Solar Panels.
Click for more information on Battery Retrofit Storage.
For more information on Solar Panels and Battery Systems contact Tanjent Energy.