[We have the pleasure to publish here an article from one of our customers, Mike Bennett, describing how to set up a solar/battery monitoring dashboard]
Having had a solar/battery system installed by Tanjent, I was enjoying seeing the performance of the system using the separate apps, but as I have an electric car this meant looking at several apps to get the whole picture. I’d learnt about a software tool called Home Assistant that would allow data from multiple sources to be displayed in a single dashboard.
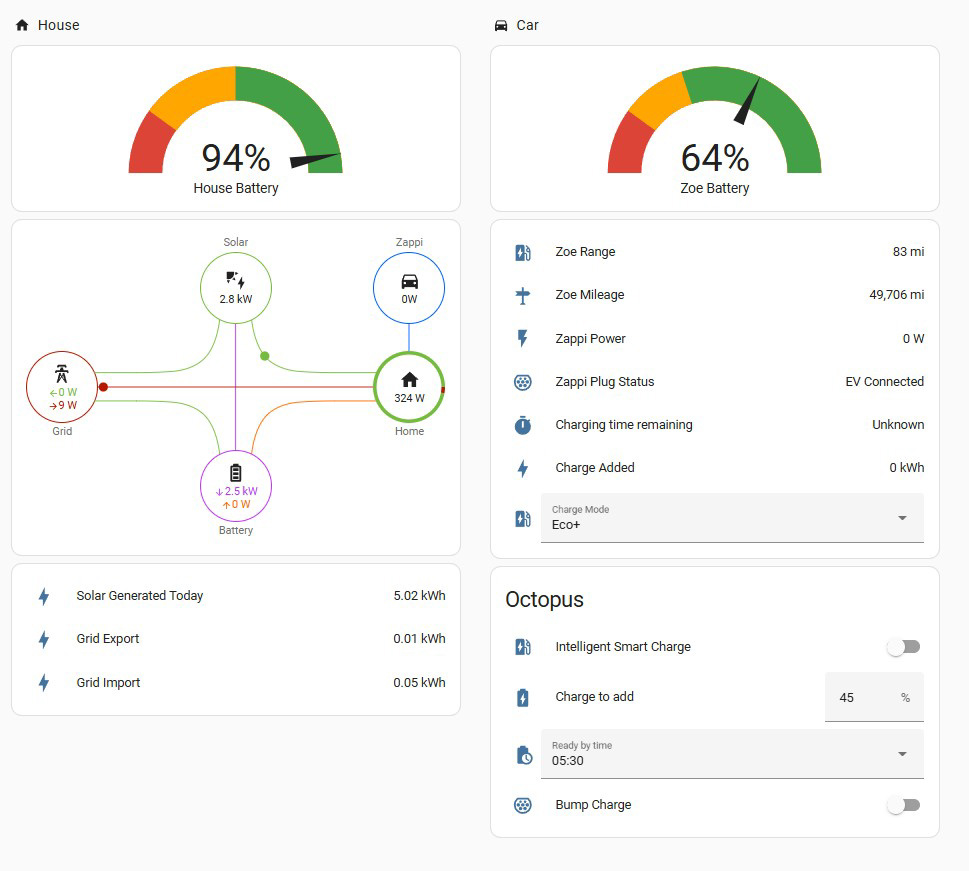
Home Assistant Dashboard (Image: M. Bennett)
This article covers some of the steps I took and gives some tips if you wish to set up a similar system yourself.
What is Home Assistant?
Home Assistant is a software tool that can be used for home automation. It takes inputs from sensors and uses these to control devices. It can also be used to create dashboards from the data collected. It is open source software so free to download and there is an active community developing add-ons for it. Add-ons have already been created for SolarEdge, FoxESS, myEnergi, Octopus and several electric cars.
Selecting the hardware
The first decision to make is what hardware to run Home Assistant on. I already had a Raspberry Pi 4 working as a file server, so this was my choice. There is a great getting started guide at Installation – Home Assistant this covers all the options.
Tip: If using a RaspberryPi, use a good quality SD card. A2 rated cards are recommended, but I found one I purchased on Ebay failed within 24 hours of running Home Assistant. Better to pay a bit more for a well known brand.
Initial Configuration
Once you have Home Assistant running, the first time you access it you will be prompted to set up a user account. As you will probably end up configuring your system to be accessible from outside your home (so you can show off your system to your friends) I’d recommend making this an administrator user as by default the first account created can only be accessed from the local network. You can create remote access users later.
Getting the data
Having got Home Assistant running you now need to start collecting data from your system. How you do this depends on the equipment you are using. I started with the myenergi integration. This has been developed by the Home Assistant community and is available by first installing the Home Assistant Community Store. This article shows how Downloading HACS – HACS
Once you have HACS installed a new sidebar item will appear. Selecting this will bring up a list of all the community projects. Instructions for adding the myenergi integration can be found here CJNE/ha-myenergi: Home Assistant integration for MyEnergi devices
Once you have the integration set up you can investigate what data this has added to Home Assistant. To do this select Settings, Devices & Services, myenergi then the entities option. This will show a list of 41 (at the time of writing) data points that the myenergi API provides. Clicking on any of these will show the history of that entity.
Creating a dashboard
Now you have some data it can be put on a dashboard. In this example we will add a simple gauge showing the amount of solar power being generated.
While still in the list of entities provided by myEnergi we are going to rename the “myenergy My home Power generation” to something a bit easier to understand. Find this entry in the list, click on it to display the graph, then click the cog at the top right.
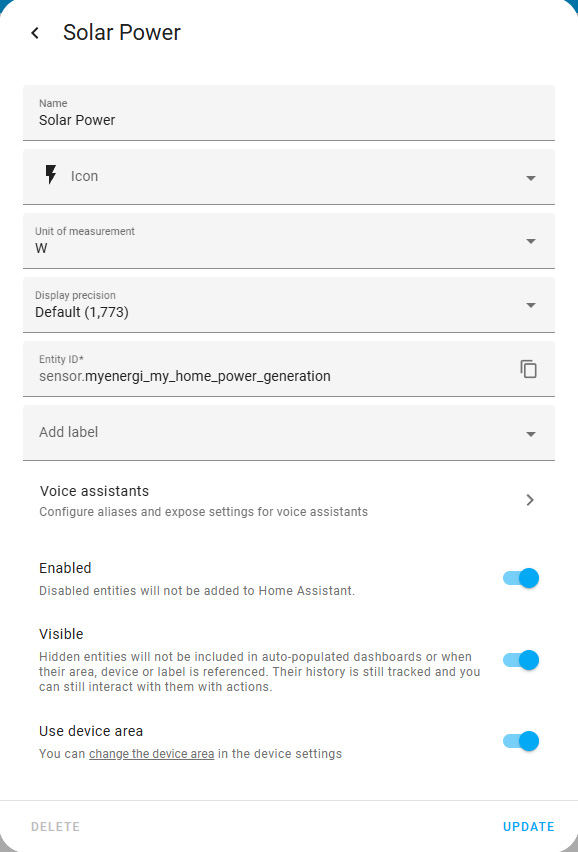
Myenergi Solar Dashboard (Image: M. Bennett)
Enter “Solar Power” in the Name field and click Update.
Now select Settings, Dashboards, Add Dashboard and select New dashboard from scratch.
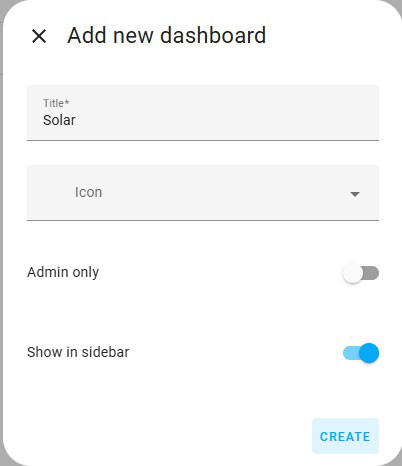
Add New Dashboard (Image: M. Bennett)
Give the dashboard a title select and icon then click Create.
Now on the dashboard list click Open on the new Solar line, then click the pencil at the top right to
edit it.
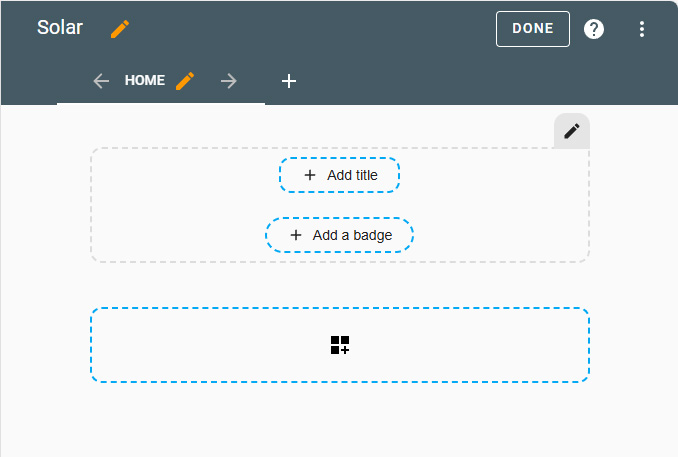
Edit Dashboard (Image: M. Bennett)
Click in the third box to add a section to the dashboard.
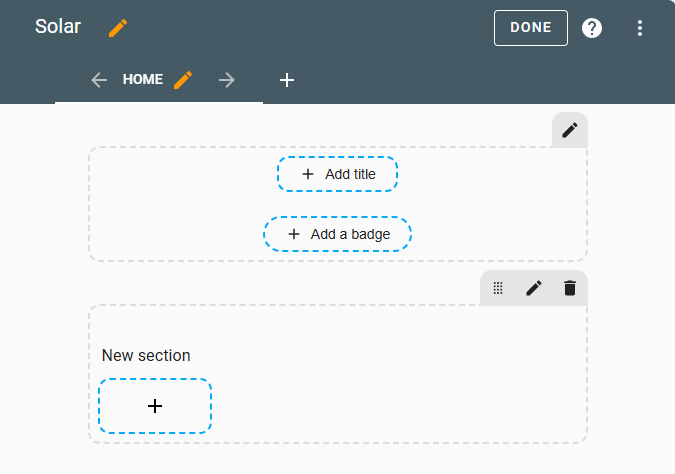
Add Dashboard Section (Image: M. Bennett)
Move your mouse over the New section text, click the pencil that appears and change the Heading to Solar Generation, then click SAVE.
Now click the + in the box to add something to this section. Scroll down the list of cards until you find Gauge, then select this.
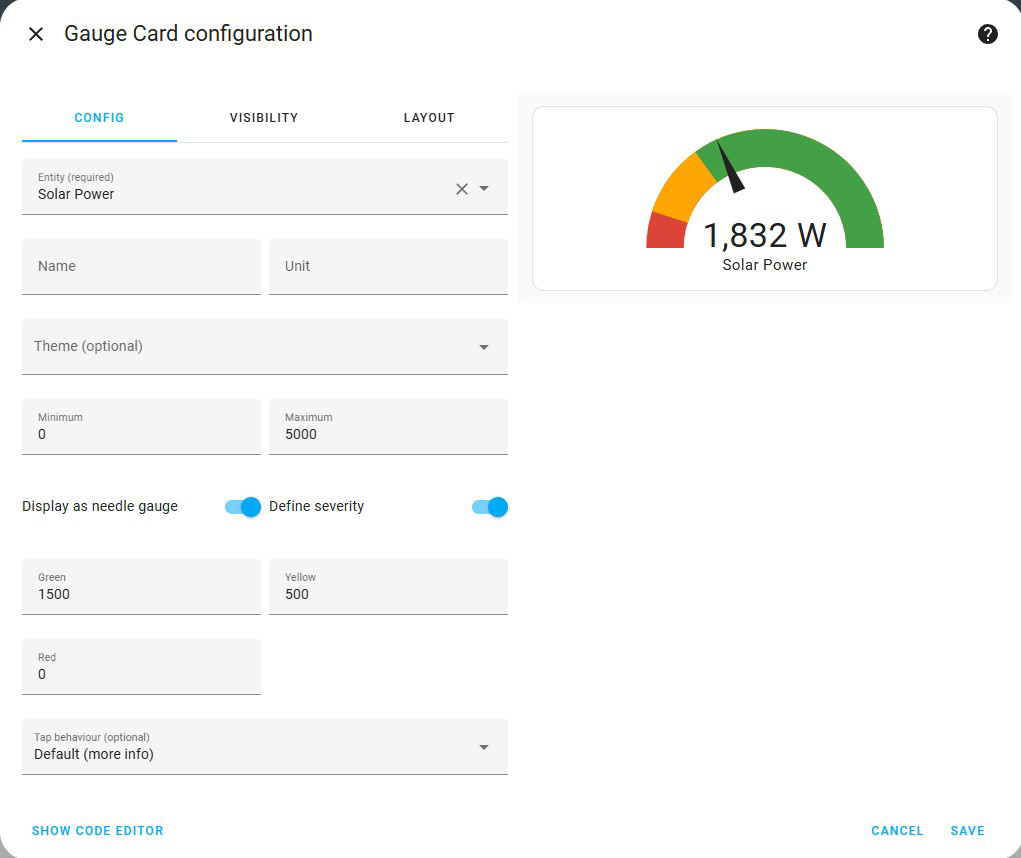
Edit Gauge (Image: M. Bennett)
In the Entity field, start typing Solar and select the “Solar Power”. Set the Minimum to 0 and the Maximum to the max output of your solar inverter. Turn on “Display as needle gauge”. Optionally you can turn on “Define severity” which will allow you to set red, yellow and green bands. Red should be left at 0, set yellow and green to the level you want each colour to start.
Click SAVE at the bottom and then DONE at the top right and you have created your first dashboard.

Solar Gauge (Image: M. Bennett)
You can now experiment with adding other values and using different cards or just add entities directly to section by selecting the BY ENTITY option at the top of the “Add to dashboard” page.
Tip: After reviewing the list of entities and deciding which ones you need, you can disable the others so they are not presented when selecting entities to add to a dashboard. This also saves Home Assistant from saving unnecessary data.
Set up a backup
Before going too far with Home Assistant it’s important to set up a backup. I followed this guide Automate Your Home Assistant Backups Like A Pro! to set up a backup to Google Drive. There are lots of videos and articles about backups if you wish to backup locally or to another service.
Other data sources
For my dashboard I used the following integrations:
- myEnergi – described above
- HA & FoxESSCloud – added using HACS
- Octopus Energy – added using HACS
- Renault – added via Renault – Home Assistant
I also used the Power Flow Card Plus card from HACS to display the power flow including that going to my Zappi.
Conclusion
Home Assistant is a powerful tool that can be used for much more than displaying dashboards. If you have things like smart lights for example these can also be controlled.
Events can be added to control devices when values change. I’ve not gone far with this yet but have set up an event when the Zappi detects the car is plugged in. This then sets the charge required on the Octopus integration to the amount needed to get the car fully charged.
